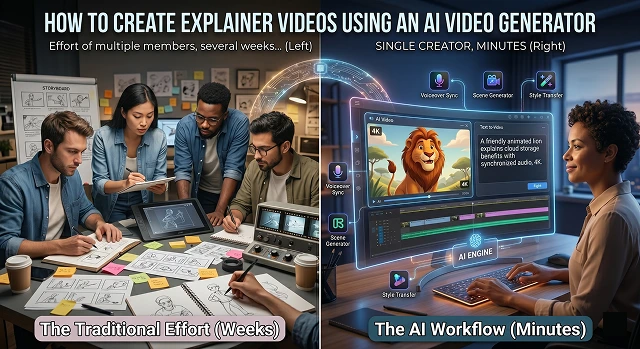
It used to take the effort of multiple members of a video animation team several weeks of work to create an explainer video. As of 2026, however, you can have an explainer video created at your desk in less than an afternoon utilizing an AI-generated video actor and video production software.
1. Select Your “AI Flavor”
First of all, you have to make a decision about what the end user will actually see. In 2026, there are basically three flavors:
- The Avatar Presenter (The "Talking Head"): A very realistic digital human presents the message on camera.
- Best For: Training presentations, corporate announcements, human resources videos, and "About Us" videos.
- Popular Software: Synthesia (with its collection of more than 230 different avatars), HeyGen (for personalized voice cloning).
- B-Roll and Stock Mix: This video combines cinema-quality images, icons, and text overlays, while the voiceover explains the concept.
- Best For: Marketing, YouTube ads, and social media.
- Top Tools: InVideo AI, Lumen5, Pictory.
- Generative Cinema: Every single frame is "dreamed up" by AI based on your description.
- Best For: Creative storytelling, high-end product concepts, or "impossible" visuals.
- Top Tools: Runway Gen-4.5, Google Veo 3, OpenAI Sora 2.
2. The 5-Step Human Workflow
Step 1: The "Tight" Script
AI tools often have "Script Generators," but they can sound generic.
- Human Hint: Get the AI to create the draft, and then edit the draft by putting in some empathy. Structure it using Problem Agitation Solution.
- The Math: You should aim for 150 words per 60 seconds. A script that contains 300 words would therefore become a two-minute video, meaning that you will lose 50 percent of your audience halfway through.
Step 2: Storyboarding (The Visual Map)
Don't just dump a script into an AI and pray. Break the script into Scenes.
- Scene 1: "Life before our app (Show a messy desk)."
- Scene 2: "The solution (Show a clean, glowing interface)."
- Tool Tip: LTX Studio is the leader here; it actually creates a frame-by-frame storyboard for you before you generate the video.
Step 3: Creating the Visuals
Here comes the fun part!
- In case of Avatars: Upload your script and select a voice. You can opt for ElevenLabs for voice-over if you find the platform’s voice too "robotic."
- In case of Text-to-Video: Click on "Style References." Upload a picture of the style that you intend to adopt (e.g., minimalist 3D or watercolor). This is because the AI will maintain consistency in all the scenes.
- In case of Stock AI: Software such as InVideo will choose clips automatically, but you need to change at least 20% of them manually to avoid making it appear like "generic corporate stock."
Step 4: Glue ("Editing & Text")
The majority of people watching video content on social media are watching it on mute.
- Dynamic captions: Add “Alex Hormozi style” captions using Captions.ai or Submagic.
- B-roll overlays: When your avatar says, "saving money," use a piggy bank clip for two seconds as an overlay. It keeps the brain involved.
Step 5: Audio Mastering
A "secret" of professional video is that audio is 70% of the quality.
- Music: It should be set to -20dB since the music must not overpower the audio.
- Sound effects (SFX): There should be a soft whoosh sound effect whenever there is text or a click effect when there is an appearance of a button. Descript can do that.
Costs & Capabilities (2026)
| Goal | Primary Tool | Est. Cost/Mo | Effort Level |
|---|---|---|---|
| Speed & Volume | InVideo AI | ~$25 | Low (Prompt & Done) |
| Professionalism | Synthesia | ~$30 | Medium (Script & Avatar) |
| Cinematic Quality | Runway Gen-4.5 | ~$15 | High (Scene-by-Scene) |
| Free/Lite | Google Veo 3 | Free Credits | Medium |
Submit Your Application
Complete the form below to initiate your AI video generation project.
The Power of "Style Referencing"
However, in 2026, you wouldn't simply input prompts; instead, you'll employ Style References (Sref). Want your video to have the same quality as a fancy Apple advertisement or perhaps the warmth of a claymation short? First, submit an image for that style.
- How it Works: AI software like Midjourney and Runway provide users with the ability to insert a "Style Image." What this does is extract the colors, lighting, and texture from the picture.
- What it Offers: With such technology, you can guarantee that Scene 1, involving a person sitting at their desk, matches Scene 5, where the rocket launches into space.
The Three Pillars of Your "AI Stack"
You rarely use just one tool. A pro-level video usually involves a "stack":
A. The Script & Logic (The Brain)
Use Claude 3.5 Sonnet or GPT-4o to write the script.
- Prompt for “Human”: “Script a 60-second explainer for a new coffee app. Speak in an engaging, humorous voice. Do not use business lingo like ‘synergy’ or ‘robust solution.’ Instead, highlight the challenge of the morning rush.”
B. The Audio (The Soul)
Never use a flat, robotic voice. Tools like ElevenLabs now offer "Speech-to-Speech."
- Pro Move: Record yourself saying the lines—even if you have a bad voice. The AI takes your emotion, pauses, and emphasis and replaces your voice with a professional voice actor's tone. This is the secret to making AI sound human.
C. The Visual Generator (The Body)
- For Consistency: Use LTX Studio. It lets you "lock" characters so the same person appears in every shot.
- For Realism: Use Kling AI or Luma Dream Machine. They handle physics (like water splashing or fabric moving) better than almost any other tool.
The Scene-by-Scene Production Process
Once your script is ready, you move into production. Here is how to handle the most common "explainer" shots:
The "Hook" (0–10 Seconds)
You need high visual energy here. Use Text-to-Video with high motion settings.
- Example Prompt: "A high-speed macro of coffee beans bursting into a whirlpool of digital data, film lighting, 8k."
The "Problem" (10–30 Seconds)
This is where you show the pain point. If you’re using an avatar, this is where they look frustrated.
- Tip: Use face-swapping or expression control (available in tools like LivePortrait) to make your character look annoyed or tired."
The "Demo" (30–50 Seconds)
If you are explaining software, don't "hallucinate" the app.
- The Workflow: Take a screenshot of your actual software. Use an AI tool like Screen-to-Video or Canva Magic Media to "animate" your mouse movements and UI buttons so they glow or pop when mentioned.
Advanced Audio: “Speech-to-Speech”
“Text-to-Speech” (Typing words and choosing the voice) is usually robotic-sounding since the machine cannot recognize key words in the content.
- The Fix: “Speech-to-Speech” using ElevenLabs.
- How It Works: You record your own reading of the script on your smartphone. It does not require high-quality audio or high-caliber speaking skills. All it requires is for you to inject inflections into your narration.
- The Spell: The machine takes your performance (“Whisper here!” “Exclaim there!”) and covers it with a professional voice actor’s cadence.
Character & Visual Consistency (The "Pro" Secret)
The biggest giveaway of a "cheap" AI video is when the character looks like a different person in every scene. To fix this, you use Character References (Cref).
- Steps to do so: First, create one "Master Image" for your character (for example, "a lady engineer wearing blue lab coat"). On platforms like Midjourney or Leonardo AI, you will put the link of the above image while giving other prompts.
- Result: No matter whether she is standing in the office or walking in the park or pointing on a board, AI maintains the exact same face and clothes of the character.
AI Explainer Video Guide
Turn complex ideas into simple, engaging visual stories with AI.
A great explainer follows the Problem-Solution-Benefit framework. Identify a pain point, introduce your product as the solution, and end with the benefits. Keep sentences short—AI voices perform best with clear, punchy lines.
Yes! Our AI can auto-suggest B-roll. Based on your script, the tool pulls in relevant icons, stock footage, or generates custom images to illustrate your points. This keeps the viewer's eyes engaged while they learn.
Look for "Instructional" or "Authoritative" voice tags. Technical topics benefit from steady, calm voices, while sales-focused explainers need higher energy. Always preview the tone to ensure it matches the gravity of your topic.
While primarily avatar-focused, you can use a Style Prompt like "2D flat vector style" or "minimalist line art" to achieve a clean, sketched look. This is ideal for professional presentations where realism might be distracting.
Our AI includes Auto-Ducking. The background music automatically lowers whenever the avatar speaks and rises during pauses. This ensures your key information is always crystal clear and never overpowered.
Yes. The most effective method is to upload screen recordings. Use the AI avatar as a floating "guide" in the corner while your actual software footage plays. It adds a necessary human touch to technical demos.
Character Branding. Instead of a generic human, create a unique avatar that reflects your brand—like a friendly robot or stylized 3D character. A distinctive "teacher" makes your complex data far more memorable.
Ready to try Hedra?
Transform your ideas into cinematic video in seconds.