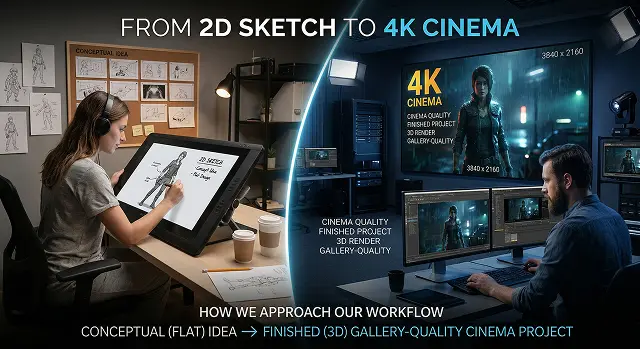
The transition from a 2D sketch to 4K cinema is how we approach our workflow as we take a conceptual (flat) idea and create a finished (3D) gallery-quality cinema project. This process connects the way we've always created art through hands-on skills ('the old school way'), with the newer technologies available to assist us in producing cinema-quality results.
1. The 2D Sketch: Where to Start
A concept begins every film. At this stage, we are thinking about how something will look and what we want from the piece. Not as much about how we will technically realise it.
- Thumbnailing: Small sketches or drawings of scenes to establish layout and flow/readability in a very quick way.
- Storyboarding: Shows camera angles, action (of characters/objects), flow of the story or pieces of the story.
- Concept Art: Concepts consist of the visual language and colour scheme of the film as well as the mood of the film. Programs ideal for creating concept art are Photoshop and Procreate.
2. Modeling and Rigging: Adding Dimension
2D sketches become 3D models(called character model) when passed through the 3D pipeline after the sketch is approved by art direction; artists build the model based on the 2D art reference.
- Models: The literally built mesh (geometry) of the character and/or environment.
- Rigging: Creation of a joint control system (akin to a skeleton) which allows animators to accurately produce animated movement of the character’s rigged model.
- Texturing (Shading): Describes how the textures on the character/environment will look (metallic rusty, shiny metal, fleshy skin, glassy polished).
3. Animation and Simulation: Create the movie
This is where the "cinema" begins to take shape.
- Visual Effect Simulation:Creating realistic simulation of physical interactions (fire, water, strands of hair, collapsing walls, etc.) will be created via a physics simulation engine (i.e., Houdini).
4. Final Stages of Production and Colour Correction
The last stage of production is performed by an individual who has completed the film at this point.
- Compositing: Compositing combines three dimensional objects, filmed live action on location, and digital background elements.
- Color Grading:Colour correction modifies the visual aspect of a shot to create specific moods (for example, use of the 'teal and orange' styling in very popular films).
- Mastering:Finalizing the content has two goals; produce a file for conventional movie theatres or an ultra-high-quality streaming service.
| ID | Phase | Comparison of Workflow Stages |
|---|---|---|
| WF-01 | Sketch |
Focus: Narrative & Mood. Mapping out the visual language and storyboards. Photoshop Procreate |
| WF-02 | 3D Build |
Focus: Structure & Form. Creating the digital mesh, skeletal rigging, and surface textures. Maya Blender ZBrush |
| WF-03 | Render |
Focus: Light & Resolution. Simulating ray tracing and scaling the output to 4K density. Arnold Unreal Engine |
| WF-04 | Cinema |
Focus: Final Polish. Professional color grading and compositing for the theatrical look. DaVinci Resolve Nuke |
Submit Your Application
Complete the form below to initiate your AI video generation project.
5. The Narrative Blueprint (2D)
This is where the vision is locked. You cannot scale to 4K if the foundation is weak.
- Visual Development (VisDev): Beyond a simple sketch, artists create "Key Beats"—paintings that define the lighting and color for the entire film.
- The Animatic: 2D sketches are timed to a temporary audio track. This is the first time the "Cinema" aspect (timing and pacing) is felt.
- Vector vs. Raster: Sketches today are often done in high-resolution raster (Procreate) or infinite-scale vector to ensure that even at this early stage, details aren't lost.
6. Three-Dimensional Forge (Production Phase)
"This dimension, added to the art of creating animated works or productions through animation, will add a third dimension to the transition from two to three-dimensional images. "
- Repologizing: When characters are created in ZBrush (sculpting system) or sculpted differently from each other, 3D artists need to have an efficient, clean way of creating a mesh so that the face can move with fluidity without appearing to glitch out.
- PBR Material*(Physically Based Rendering): For materials to be rendered using physically based rendering, the material has to meet requirements such as how the material appears in relation to the size/scale of the material and how it behaves upon rendering based upon various variables.
- Rigging/Skinning: Assigning the weight to the mesh to allow the facial area to function naturally when the character smiles or makes an expression.
7. The Lighting & Simulation Level
This is where "CGI" becomes a guess instead of real film making.
- Global Illumination (GI): Simulating how light affects something besides just where it hits, by reflecting off objects in the environment.
- Particles: Adding objects that create atmosphere (dust, fog, sparks, etc.) at the 4K level, by creating texture for a final product, show that it has been made at a high cost.
- Motion Capture (MoCap): Taking a 2D drawing/illustration of a character and having a human perform it with sensors on and translate that performance directly to the 3D character.
8. The 4K Render & The "Final Look"
4K is more than just a pixel count ($3840 \times 2160$); it is a standard of clarity.
- Deep Compositing: Deep Composite Artists create images by rendering them as 'layers' (e.g. Shadow, Reflection & Z Depth) and then stacking them together in a application such as Nuke to manipulate the image after rendering.
- Bit Depth: The standard definition of videography is 16 million colours, whereas the industry standard for cinema films at 4K is either 10 or 12 Bit Colour which gives nearly 1 Billion colours available to stop gradients from banding e.g. Sunsets.
- The AI Bridge: In modern workflows (like yours at Hedra), AI models can now take a 2D sketch and "hallucinate" the 3D geometry and 4K textures in seconds, bypassing months of manual modeling.